My First Blog – I hate Medicine Cabinets! Thursday, Apr 1 2010 

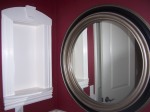
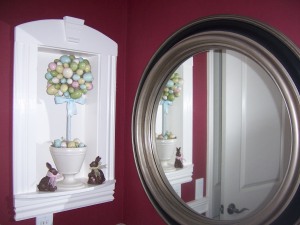
The finished look...for Easter at least

No really.  I don’t like Medicine Cabinets.  While I realize that they are sometimes a necessary evil…I still dislike them very much and I like to remove them from my bathrooms whenever I can.  Especially in a guest bath.  They only tempt your guests to peek inside. You know who you are!  Don’t believe me?  Try putting marbles inside and when they open it, the marbles will come rolling out all over the floor and They’ll never do it again.  BUSTED!  So to keep my guests honest and out of trouble…I just remove them and take something so “beige” and boring to Bodacious.  I’ll be posting some before and after photos along with some “Do it yourself” instructions.

 But what do you do with the large hole in the wall?  Glad you asked.  Let me share.

My wife hates the cabinets as much as I do, so in a recent discussion about “beefing up” the guest bath she suggested that we make it into a display nook.  Of course I just can’t do bland and “beige” so I took her initial idea and made it…wait for it…wait for it…yep you guessed it Budget Bodacious. 

Now I could have just patched the hole and painted, but it’s not that simple.  See, we have skip-trawl texture on our drywall and I simply don’t know how to do it without it looking like my 4-year-old did it.  That meant I would need to hire someone to complete the task.  That could have cost me at least $100 because who’s gonna come out to patch a hole in the wall for less than that…It would cost them more in fuel to drive to my house.  I didn’t want it to look “patched”  I need it to look INTENTIONAL and not an after-thought.  Remember…It’s all about the details.

Since Christa and I are currently in enrolled in Dave Ramsey’s Financial Peace University, I knew I need to keep this in BUDGET.  I wanted to make Mr. Ramsey proud of his star student.  So I went to work.  I removed the medicine cabinet and took some measurements.  I started by building a box the same depth, height and width of the medicine cabinet.  Thank GOD for Home Depot and Lowes who are gracious enough to rip wood to my desired depth/width.  Don’t forget that home improvement stores will cut wood for you.  This will save you time and money.  You only need to buy what you will use on a project. 

After building the box, I added a shelf and some great molding.  Remember it’s all in the details, so make sure the molding is wide enough to give it the WOW factor.  I added an arched shelf on the bottom that is wide enough to put a seasonal “something” on it.  Since it’s close Easter, my wife has a topiary egg tree displayed on it now.  I’m sure she is already shopping around for the next item that will be on display.  To finish it off, it has an arched top with a keystone applique.  Never forget the details!  Total cost of this medicine cabinet make-over?  Under $50 bucks…and it doesn’t look like an after-thought.  Bodacious on a Budget!  Photos to be posted later.

Check back as I will be adding additional architectural features with molding to this bathroom that takes it a step beyond just a BLAH BEIGE chair rail.  Also I’ll be sharing photos of a paint technique in my daughters bedroom that looks like a million bucks.
Before

Left with a big holeDo It Yourself Niche

Do It Yourself Niche

Bodacious is Back! Saturday, Sep 4 2010 

After some struggle with a medical mis-fortune, its time for me to grab my honey-do list, fine-tune my creativity and get some of these Bland-to-Bodacious projects completed before the holidays begin.

The “holidays” begin early at the DeRouen home.  Both of our girls have birthdays in September and October which calls for special-themed parties that bring guests into our home early in the Fall.  This year will be Neopolitan complete with ice cream. The celebrations continue into early January when we celebrate my wife’s birthday.  She’s been turning 30 for several years now.

So after some time away from my projects for some physical and mental healing, I tackled the guest bath that I started in early spring before the medical crisis.  The bathroom began with deep red walls and ceiling when we first moved into our new home almost 5 years ago.  Now that we are planted, it was time to take it up a knotch.

I really like flat paint as it shows a true color and does not reflect light which can cause shadows and dull the real contrast that paint brings to a room. In a bathroom however, flat paint is not all that practical.  What happens over time is that the area near the sink and light switches becomes really worn to say the least.  However we opted for flat paint in this bathroom since it is the guest bath and rarely gets used because my sweet mother and father-in-law don’t visit quite often enough.  The water from little and big hands alike drips down the wall and stains the surface.  I needed a solution.  I needed it to be bodacious and it need to stay within the budget.

After consulting with “The Mayor”…My like-creative wife, we came to some solutions.  First-things-first.  We both hate mirror medicine cabinets and in the guest bath, what’s the point right?  So we removed the medicine cabinet and I built a custom niche.  Just a few materials from Home Depot and Lowes and I was able to create a whole new look for just about $25 and a few hours of labor.

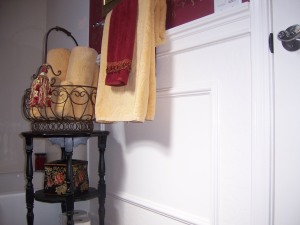
Now to address the drippy stains on the wall below the light switches.  We both knew that we needed a paint with sheen but it had to be…wait for it…wait for it…Bodacious.  We decided to create faux panels on the wall with some very simple and inexpensive molding.  We also decided to add a chair rail just below the light switches and paint it the same color of the trim throughout the bath with a semi-gloss paint designed for doors and trim.  We took steps to plan that the molding would install just below the light switches so that I would not have to notch the molding.  “Notching” creates so much more work and looks a-bit unfinished and unplanned.  While installing the faux panels on the lower section of the wall, we noticed that the base trim looked ill-proportioned for a room that had 10′ ceilings and a great new wainscoting effect.  We resolved this delimma by borrowing an idea that we recently saw on HGTV, Divine Design with one of our favorite designers Candice Olson.

The existing base molding was about 2 1/2″ in width and I wanted to end up with at least a 6″ in width.  We found a very simple molding to install at the 6″ mark and after painting it all white, it gave the effect of having a 6″ base trim.  Now that’s Bodacious baby! We weren’t finished yet.

The red walls above the chair rail were pretty basic, it was sleek-looking but still pretty bland.  We really wanted to wall-paper, but the wall paper we wanted was pretty expensive and out of the budget.  So while on a shopping trip to one of our favorite accessory stores, Hobby Lobby we found the solution.  It was a stencil that mimmicked the wallpaper that we originally wanted.  The stencil was about $10 after we used our coupon.  We chose a champagne-tinted glaze for the stenciling and the walls became alive or should I say bodacious.  None the less, we now felt that the bathroom was complete.

With my honey-do list in-hand, it is now time for me to complete adding molding around the windows in the living room.  Before I know it, it will be time to put up the Christmas tree and send out the invitation to our annual Christmas open house.

Speaking of decorating.  It’s still 110* here in Phoenix in the month of September but my wife just can’t wait to get out the fall decorations and get the house all festive.  So she’s started here in the guest bath with some halloween decor.  Great thing about this nich is that you can change the look with each holiday.

Some final thoughts about do-it-yourself projects.  Remember the details.  When painting and adding molding, spend a few extra bucks at Lowes, Home Depot or even Wal Mart and invest in some latex caulk and spackle paste.  Having a nice transition from the molding to the wall takes a little extra time but the result will be professional.  Here is a little quote that a my friend Barry Boyd, a fine custom cabinet-maker shared with me.  “A little caulk, A little paint…Makes a man what he Ain’t.”  Caulk is key on this type of project.

Now get your project list out and start turning Bland into Bodacious one step at a time.  I’ll be back when the next project is complete.

If you liked this posting, please share it with your friends.